 how-to
How Do You Make Pour-Over Coffee Step by Step?
Last Updated: October 25, 2026
Quick Summary
Pour-over coffee is a manual brewing method where you pour hot water over ground coffee in a dripper, controlling temperature, grind size, and pour rate to extract flavor. Use a 1:16 coffee-to-water ratio, medium-fine grind, 200-degree water, and aim for a 3 to 4 minute total brew time for consistent results.
- Use a 1:16 ratio of coffee to water by weight as your starting point
- Grind coffee to medium-fine size, like fine sea salt, for optimal extraction
- Heat water to 200 degrees Fahrenheit before pouring
- Brew time should fall between 3 and 4 minutes total, including the 40-second bloom
- Pour in three stages after the bloom to maintain steady water flow through the grounds
Table of Contents
- What You'll Need to Brew Pour-Over Coffee
- Getting the Pour-Over Coffee Ratio Right
- Selecting the Right Pour-Over Coffee Grind Size
- Step-by-Step Brewing Instructions
- Understanding Pour-Over Coffee Brew Time
- Pour-Over Coffee Troubleshooting: Taste and Technique
- Scaling Your Recipe and Caring for Equipment
- Start Brewing Your First Cup
- Frequently Asked Questions
What You'll Need to Brew Pour-Over Coffee
Pour-over coffee is a manual brewing method that gives you complete control over every step. The process is straightforward, but having the right equipment makes a real difference.
Start with a coffee dripper. The most common options are ceramic, glass, or plastic cones. Each one works well, choose based on what fits your kitchen and budget.
A gooseneck kettle is worth the investment. The thin spout lets you pour water with precision and control. A regular kettle works, but you'll have less control over your pour rate.
Finally, you need fresh coffee beans and a way to grind them. You can find 5 Best Manual Coffee Grinders for Beginners to explore grinder options that work for home brewing.
| Equipment | Purpose | Essential? |
|---|---|---|
| Dripper (ceramic, glass, or plastic) | Holds filter and grounds | Yes |
| Paper or metal filter | Separates grounds from brew | Yes |
| Gooseneck kettle | Precise water pouring | Recommended |
| Scale | Measure coffee and water | Recommended |
| Timer | Track brew time | Helpful |
| Burr grinder | Grind beans to correct size | Yes |
Getting the Pour-Over Coffee Ratio Right
The pour-over coffee ratio is the foundation of consistent brewing. Most brewers use a 1:16 ratio of coffee to water by weight. This means 1 gram of coffee for every 16 grams of water.
Here's how to apply it in practice. If you want 10 ounces of brewed coffee, multiply by 16 to get 160 grams of water.
Some people prefer stronger coffee and use a 1:15 ratio instead. Others like it lighter and go with 1:17. Start with 1:16 and adjust based on taste.
Using a scale removes all the guesswork. You won't have to estimate or remember complicated conversions. Just place your dripper on the scale, add grounds, and pour water to the target weight.
Selecting the Right Pour-Over Coffee Grind Size
Grind size controls how fast water moves through your coffee grounds. Too coarse and water rushes through without extracting enough flavor. Too fine and water gets stuck, over-extracting and creating bitterness.
Pour-over coffee works best with a medium-fine grind. This size looks like sand or fine sea salt. It's not powder, but it's noticeably finer than what you'd use for a French press.
The grind size affects your brew time. A medium-fine grind typically takes 3 to 4 minutes to brew. If your brew finishes in under 2 minutes, your grind is too coarse.
Understanding roast profiles helps you choose beans that work well with pour-over brewing. Learn more about What Makes Light and Dark Roast Coffee Taste So Different? to select beans that match your brewing method and taste preferences.
Test your grind by looking at how water flows through. You should see a steady, even drip, not a gush and not a slow trickle.
Step-by-Step Brewing Instructions
Follow these steps in order for consistent results every time. The recipe below is a tested starting point for a single 10-ounce (300 ml) cup. Use a scale for every measurement, including water, and keep a timer running from the moment you start the bloom.
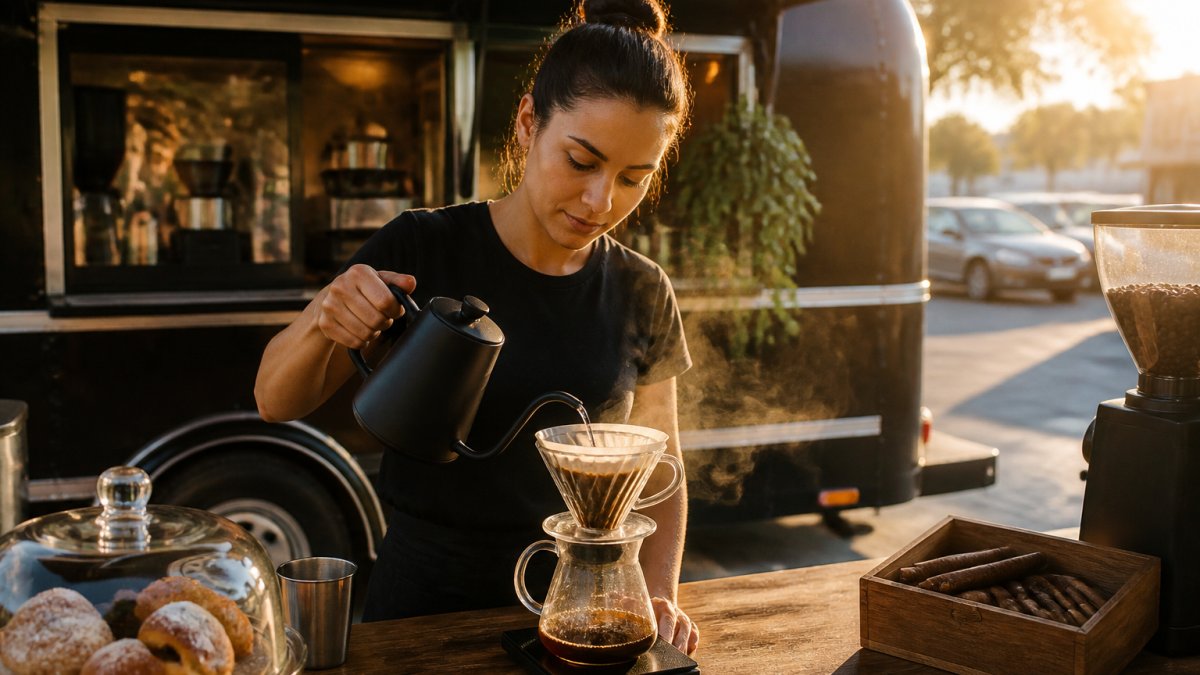
The baseline recipe:
| Variable | Setting |
|---|---|
| Coffee dose | 18 grams |
| Water amount | 300 grams (about 10 ounces) |
| Ratio | 1:16.7 (close to the standard 1:16) |
| Water temperature | 200 degrees Fahrenheit |
| Grind size | Medium-fine (like fine sea salt) |
| Bloom water | 36 grams (twice the coffee weight) |
| Bloom time | 40 seconds |
| Target total brew time | 3:00 to 3:30 |
Step 1: Heat Your Water
Heat water to 200 degrees Fahrenheit. This temperature extracts flavor without scorching the grounds. If you do not have a thermometer, bring water to a boil and let it cool for about 30 seconds before pouring. A gooseneck kettle with a temperature display removes the guesswork.
Step 2: Prepare Your Dripper and Filter
Place your paper filter in the dripper and rinse it thoroughly with hot water. This removes paper dust and preheats the dripper so the brew does not lose heat at the start. Empty the rinse water from your cup or server before brewing.
Step 3: Add Grounds and Bloom
Place the dripper and server on your scale and tare to zero. Add 18 grams of medium-fine grounds, then tare again. Start your timer and pour 36 grams of water evenly over the grounds, just enough to saturate them. Wait 40 seconds. The bed should puff up and bubble as carbon dioxide escapes; this is the bloom. A fresh roast will bloom more vigorously than an older one.
Step 4: Pour in Stages
After the bloom, pour in three controlled stages. Keep the water level about halfway up the dripper and avoid letting the bed go dry between pours.
- First pour: At 0:40, pour steadily in circles from the center outward until the scale reads 140 grams. Finish by about 1:10.
- Second pour: At 1:20, pour again to reach 220 grams. Finish by about 1:50.
- Third pour: At 2:00, pour the remaining water to reach 300 grams. Finish by about 2:30.
The brew should finish draining between 3:00 and 3:30. If it drains much faster, your grind is too coarse; if it stalls well past 3:30, your grind is too fine. Adjust the grind, not the pour schedule, on your next brew.
Step 5: Swirl and Serve
Once the bed has drained flat, remove the dripper and give the server a gentle swirl. This mixes the layers of the brew so the first sip tastes the same as the last. Serve immediately.
Understanding Pour-Over Coffee Brew Time
Total brew time for pour-over coffee typically falls between 3 and 4 minutes. This includes the bloom phase plus all your pours.
Brew time tells you a lot about what happened. If your brew finishes in under 2 minutes, water moved too fast through the grounds. This usually means your grind is too coarse or you didn't pack the grounds firmly enough.
If brewing takes longer than 5 minutes, water is moving too slowly. Your grind is likely too fine. You might also have poured too much water or poured too slowly.
The sweet spot is a steady drawdown where water flows smoothly and the brew finishes in 3 to 4 minutes. At this pace, you extract enough flavor without bitterness.
Pour-Over Coffee Troubleshooting: Taste and Technique
Most pour-over problems show up in two places: how the coffee tastes and how the water drains. Use the table below to diagnose the issue, then change only one variable at a time so you can tell what worked.
| Symptom | Likely cause | First adjustment |
|---|---|---|
| Sour, sharp, or salty | Under-extraction | Grind finer in small steps |
| Bitter, harsh, or drying | Over-extraction | Grind coarser in small steps |
| Weak or watery | Too little coffee or too much water | Tighten the ratio toward 1:15 |
| Muddy or silty cup | Too many fines or a torn filter | Check the filter and grind consistency |
| Drains in under 2:30 | Grind too coarse | Grind finer |
| Stalls past 4:00 | Grind too fine or too much agitation | Grind coarser and pour more gently |
Start with grind, then ratio, then temperature. Grind has the largest effect on extraction, so adjust it first.
Read the drawdown. Watch the bed as it drains. A steady, even drawdown that finishes in 3:00 to 3:30 is the target.
Check consistency before chasing flavor. If brews vary from cup to cup, the problem is usually measurement. Weigh the coffee and the water every time, and use the same grind setting. A scale and a consistent pour schedule solve most inconsistency.
When the coffee tastes flat or papery, check the roast date. Coffee more than a few weeks past roast loses the aromatics that make pour-over rewarding. Store beans in an airtight container away from light and heat, and grind just before brewing.
Scaling Your Recipe and Caring for Equipment
Brewing four cups instead of one? The ratio stays the same. If your single-cup recipe uses 20 grams of coffee and 320 grams of water, multiply both by four. You'll use 80 grams of coffee and 1,280 grams of water.
The brew time might stretch slightly when you're brewing more. You're pouring more water, so the process takes a bit longer. Stay patient and pour in steady stages.
Cleaning your equipment keeps it working well. Rinse your dripper and filter immediately after brewing. Paper filters go in the trash. Metal filters can be rinsed and reused. Let everything dry completely before storing.
For reusable metal filters, soak them in hot water once a week to remove any buildup. This keeps your brews tasting clean and bright.
Start Brewing Your First Cup
Pour-over coffee rewards precision and attention. You control the temperature, the grind, the pour rate, and the brew time. This control is what makes the method so rewarding.
Start simple. Use the 1:16 ratio. Aim for a medium-fine grind. Heat water to 200 degrees. Pour in stages and watch for a 3 to 4 minute brew time.
Taste your first cup. Adjust based on what you notice. Too weak? Try a finer grind or slower pour. Too bitter? Go coarser or pour faster. Each adjustment teaches you something.
At Laffogato Coffee, we understand that quality starts with fresh beans and proper technique. Explore How to Identify Specialty Grade Coffee Beans to understand what makes specialty coffee different and why it matters for your pour-over setup.
Once you dial in your technique, you'll brew better coffee every time. The process becomes automatic, and the results stay consistent.
Frequently Asked Questions
What is the best coffee-to-water ratio for pour-over?
The standard pour-over coffee ratio is 1:16, that's 1 gram of coffee to 16 grams of water. For a single 12-ounce cup, use about 0.75 ounces (21 grams) of ground coffee and 12 ounces (340 grams) of water. Adjust this ratio to taste: use slightly less water for a stronger brew, or more water for a lighter cup. Consistency matters more than perfection, so measure by weight if possible.
What grind size should I use for pour-over coffee?
Pour-over coffee requires a medium-fine grind, slightly finer than drip coffee but coarser than espresso. The grounds should feel like sand between your fingers. A burr grinder gives you the most control; blade grinders produce uneven particle sizes that lead to inconsistent extraction. If your brew tastes sour, try a slightly finer grind. If it tastes bitter, go coarser.
How long should pour-over coffee brew time take?
Total brew time for pour-over coffee is typically 3 to 4 minutes from first pour to last drip. The bloom phase takes 30 to 45 seconds, and the remaining water should pour over the next 2 to 3 minutes. Brew time depends on grind size, water temperature, and how fast you pour. Use a timer to track consistency. If drawdown is too fast, your coffee tastes sour; if too slow, it tastes bitter.
Why does my pour-over coffee taste bitter or sour?
Bitter taste usually means over-extraction, water stayed in contact with the grounds too long. Try a coarser grind, shorter brew time, or cooler water (around 195°F instead of 205°F). Sour taste signals under-extraction, the water moved through too fast. Use a finer grind, pour more slowly, or hotter water. Also check your water quality; mineral content affects flavor. Fresh beans roasted within the last 2 weeks also make a noticeable difference.
Brewing pour-over coffee at home gives you café-quality results without leaving your kitchen. The method takes practice, but the learning curve is gentle. Start with fresh beans from Laffogato Coffee, measure your ingredients, and follow the steps above. You'll be brewing excellent coffee within your first week.